I’ve been playing around with the idea of sous-vide cooking for some time, but had never tried it.
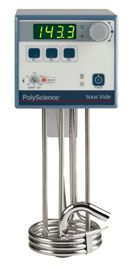
Sous-vide, (French for under-vacuum) is simply cooking without air — usually at low cooking temperatures, a vacuum sealed bag of food is placed under water and allowed to cook at the desired internal done temperature. Cooking like this prevents any over-cooking throughout the food (think of the steak that’s pink in the middle and well-done everywhere else) and it retains all of the foods natural juices and flavours. The biggest problem for the average foodie is that you need a device called a thermal immersion circulator that costs in the neighbourhood of $1300. The reason you need such a fancy device is because when you’re cooking meat sous-vide, you need to keep your meat at the right temperature to prevent both over-cooking and under-cooking (food poisoning). Because of the fairly narrow temperature window you need something that has the capability to maintain a low stable temperature. But I digest…er, digress…
Eggs are great for sous-vide because they’re already in their own little hard white vacuum packages and the cooking temperatures aren’t critical.
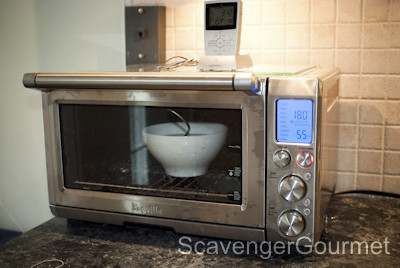
My set-up was simple, an egg in a bowel of water, in my toaster oven, with a temperature probe in the water. Being able to set the oven temperature and monitor the water temperature proved critical. I found that in order to maintain a 150° F water temperature, I had to set the oven to about 210°F. If you have a gas stove, I’m sure you could manage to get the right temperature with a low flame in a regular pot of water, but I’ve got a ceramic cook-top (much to my chagrin!), so stove-top cooking wasn’t really an option. Electric stoves just aren’t stable enough — your temperatures would be all over the place.
It took longer than I expected for the water to heat up to temperature, so all together it took me two hours for an egg. The usual cook time for a sous-vide egg is one hour. That’s another reason for a thermal immersion circulator! With a thermal immersion circulator, because the water is being heated directly and is always moving around, things get up to temperature much faster.
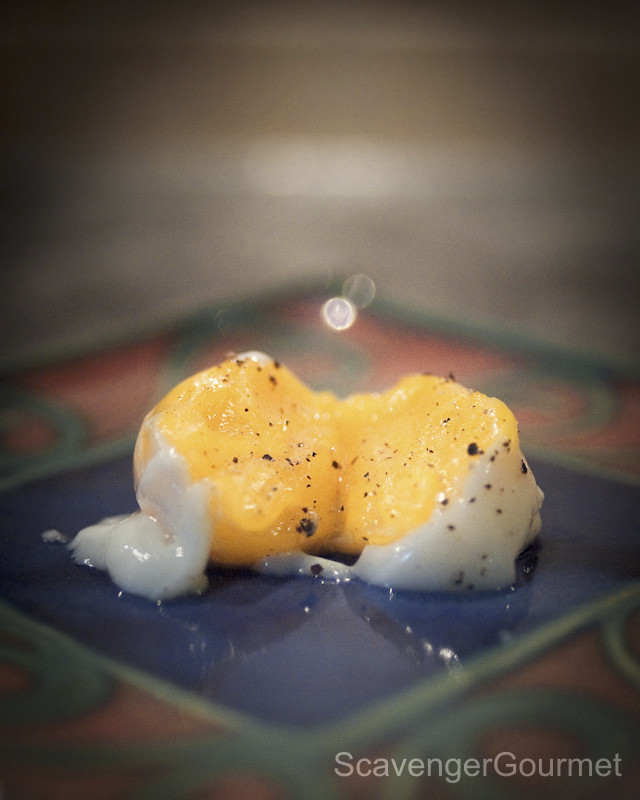
The end result? Well, the proof is in the pudding…so to speak. I tried a bit of the egg whites, and they weren’t really all that good. The whites were, white (duh!) but pretty much flavourless and slimy. I tried some, but they mainly went into the compost. They slid off easily enough to not be an issue. The yolk, on the other hand, was delicious! Smooth, thick, and creamy, and loaded with eggy flavour. Think of the best poached egg you’ve ever had, and this was better…no kidding. True, the whites were meh, but the the yolk was something else. Add a little pepper, et voilà!
Definitely something easy and yummy to do that will impress your guests at your next brunch, and because you can pretty much set the temperature and come back to it hours later, you’re free to prepare the rest of the meal at the same time.
 So, yes…for those of you who are wondering, I am coming up with plans for a DIY sous-vide thermal immersion circulator! There are a few DIY plans out there, but none match the quality you would get from a PolyScience 7306C. I’m sourcing out parts now and hope to be in the sub-$200 range. Unfortunately, things always seem way more expensive in Canada, so I’m having to look a little harder than expected to keep the price under $200, while maintaining top-level quality.
Until next time!
Bon Appetite,
Mr. Carnegie, Scavenger Gourmet


One Reply to “Toaster-oven sous-vide eggs”